Do you love colors but you don’t know how to combine them for a good furniture makeover project? Stripes may be the answer. Stripes can add a pop of color and make shine even the more basic piece of furniture.
Now on to the DIY Striped Coffee Table. This is another project realized by my friend Chrystele. She found this basic coffee table on a local Ads classified website. Unfortunately she forgot to take a proper before picture. She only remember to take a picture after she sanded down the table top.
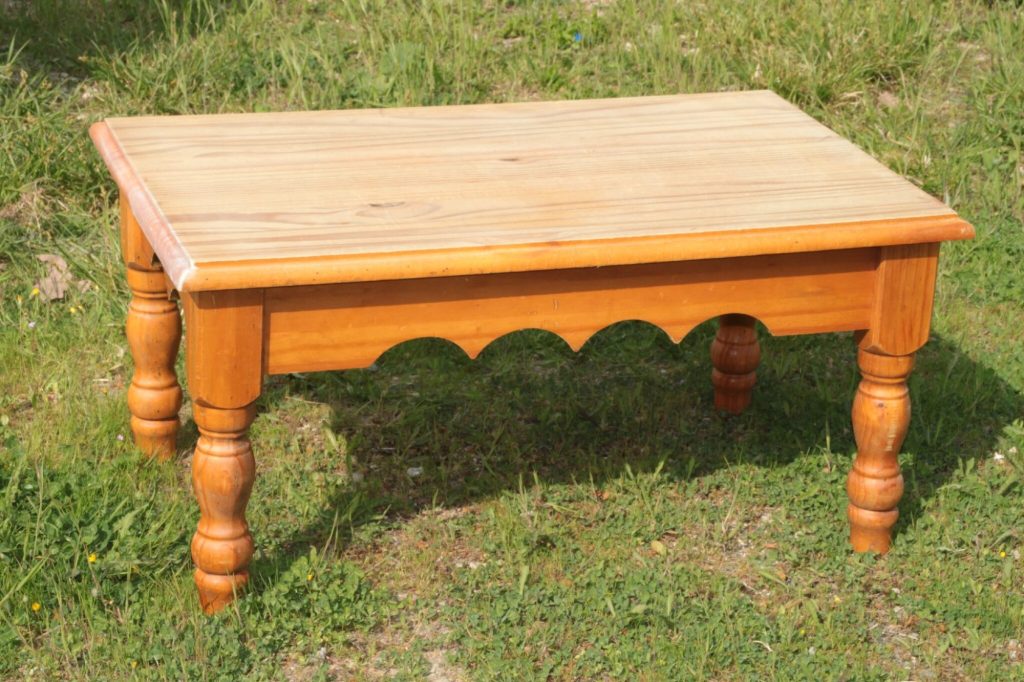
The coffee table must have been used as a child desk. The top was full of scratches and covered with pen marks. However the coffee table was made of solid pine wood and the structure was in very good condition. In a nutshell, it was the perfect candidate for a makeover.
Table of Contents
Supplies for the Striped Coffee Table Makeover


 - Packaging May Vary")

 (8oz)")

 , YELLOW")
Prep Work
Chrystele first cleaned the coffee table with a degreaser. She then sanded the entire piece making sure to remove all stains and scratches from the table top.

Paint process
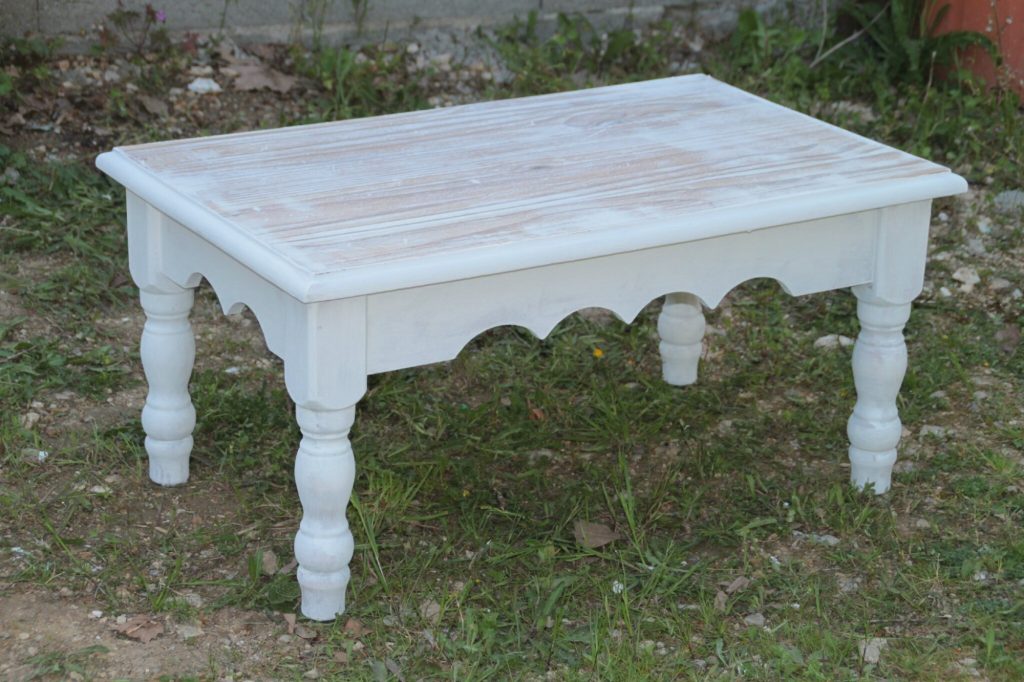
First, Chrystele applied a primer paint on the table legs. As for the table top, she decided to go for a whitewash effect. If you want to see another whitewashed coffee table, make sure to check this Coffee Table Makeover: Whitewashed & Distressed.
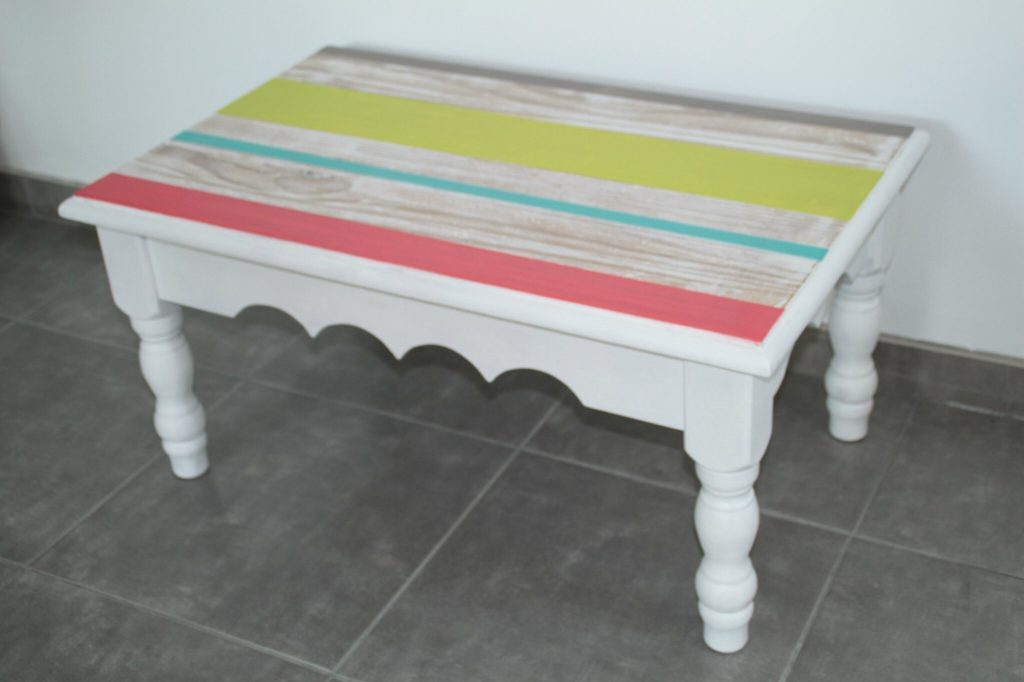
Chrystele then painted four stripes on the table top with four different colors: smoky grey, anise green, turquoise blue and pink. To paint regular stripes, she simply used painters tape. Be careful when you remove the painters tape as it may damage your first coat of paint. Pull the tape just after painting the stripes.
Last step, she applied one coat of matte poly to the table.
Here is the final result! This cute coffee table is ready for a new life.
And here is the striped coffee table in Christelle’s living room.

Save this post for later!

Happy Makeover!