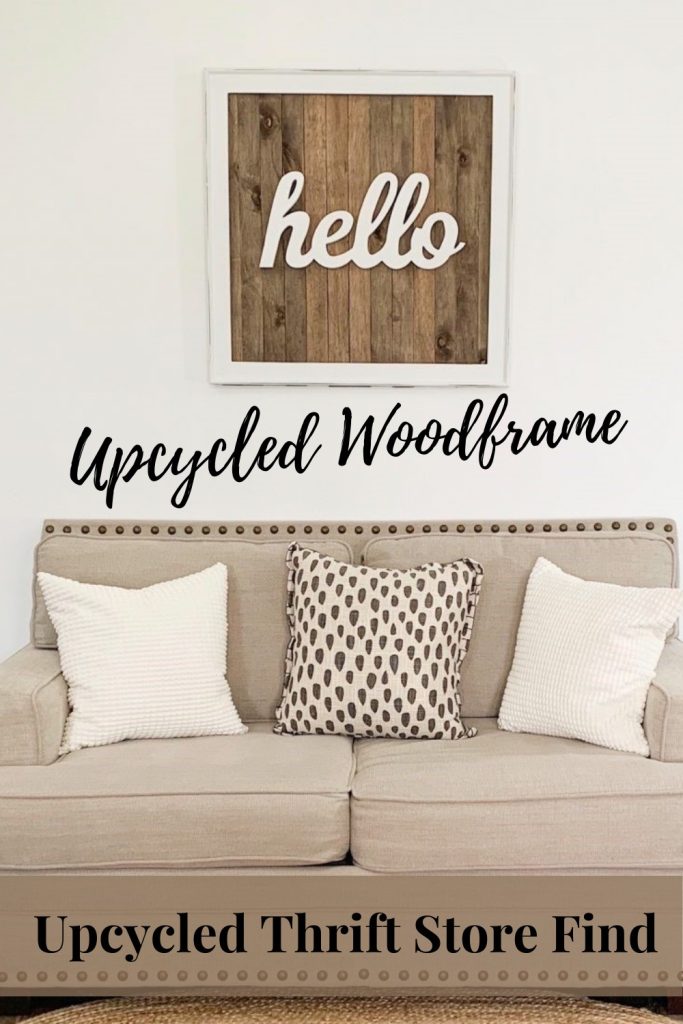
I love finding old wood frames at the thrift store. Especially when they are wood. They make such great DIY projects! Like this one that I found at my local Goodwill (the Hobby Lobby price tag was still attached). The price was $4.99 which I thought was a great deal. The same day, I also found this Hello wood cutout for $2.99. I will show you how I took these two thrift store items and created a rustic DIY farmhouse planked sign.
Disclosure: This post was compensated and written in collaboration with Suerbonder®️. All opinions are my own.

The Planks
For the planks, the Hubs went through his wood stash. He is so much like me; nothing gets thrown away around here. While looking, he found this piece of scrap birch wood. The planks would be cut from this piece of wood. Cost, zero dollars!

Before cutting, he measured the frame to determine what the length and width needed to be of each plank and how many planks would be needed to cover the back by measuring the width. It was determined that the wood planks needed to be 2” wide and 29 1/2” long. The planks were cut using his table saw. He ended up cutting 13 wood planks.

Next, he sanded each plank with a piece of 220-grit sandpaper, just to remove the rough edges after cutting.

Staining the Wood Frame and Planks
The frame wood color is light and would not stand out once distressed. Therefore, I decided to stain the frame with Minwax Dark Walnut, a deep, dark brown. Using a small chip brush, I brushed on the stain, and then wiped off the excess with a cloth.

Each plank piece also received a coat of the stain.

The Painting Process
The next day, it was time to paint the frame and the wood cutout.
I was not happy with the light wood color of the cutout so I decided to paint the cutout white, just like the frame. I chose to use Dixie Belle paint in Cotton. It only took one coat of the Dixie Belle Cotton to cover the cutout.

The frame received two coats of the Dixie Belle Cotton. I allowed about an hour drying time in between coats.

Distressing
Once the frame dried for about 2 hours, it was time to distress. I used a piece of 220-grit sandpaper and distressed around the edges of the frame.

I used a piece of tack cloth to remove any sanding dust that was left behind.
Adding Planks to Frame
It was time to add the wood planks to the frame. For this project, we are using the Surebonder® TRIGGERFIRE™ Staple Gun. It is the world’s first trigger activated staple gun. I was excited about the “trigger” part. It’s hard on my hands and wrists to use a regular staple gun. It takes a lot of strength in order to apply pressure. With this staple gun, it was as simple as 1) squeeze down the handle to activate; 2) place staple gun on the surface; and; 3) squeezing the trigger.


Staples were placed on each end of the plank.

The planks were added and a glue wood strip on the back in the center to help with the stability of the planks. We used our Surebonder® Glue Gun to attach the strip.

The wood cutout was then stapled into place. This was done while the Hubs held the sign up. He directed me to each spot that needed a staple. You can see from the photo, the cutout was thick. But the Surebonder® TRIGGERFIRE™ Staple Gun stapled with ease. I was so impressed! Even with the sign being held up, not laying flat we had no issues. And, there was no pressure on my hands or wrists.

For less than $10.00, I have a gorgeous, handmade farmhouse planked sign. These signs are pretty pricey when purchased new, but using thrift store items, it made this project budget-friendly.


Save this project for later!


Wow Christina, this turned out amazingly beautiful! It’s the perfect piece for where you had it in the last photo. Adorable! I always shake my head in amazement at what you and your hubby create together. It’s magic!! ♥ Sending you all my love. I hope you and your family are well.
Thank you so much Holly! We are well and I hope you and your family are as well 🙂 Hugs!
You are most certainly welcome sweet Christina. Praise God we are well too. Sending hugs right back at ya! ????
This is taking creativity to the next best level. Absolutely amazing job. Loved how it hangs on the wall.
Thank you Holly! 🙂
This is so cute! I love how it turned out!
Thank you 🙂
I love this idea. As always, you are the best.
Awww thank you Linda your so sweet! You made my day 😉
I really am going to try my hand at this one. Probably today. All normal plans have been canceled. (That was humorous sarcasm! lol) No kidding, I am excited about that stapler because I now have very painful arthritis in my right hand. This would be a God send. Love the project. Thank you for continuing to bring “can do” ideas during this different time. Stay safe and healthy.
Thank you! I know what you mean about normal plans lol it’s crazy. But at least we can craft :-). Your very welcome anything I can do to take your kind off off of these times even if just for a bit!